Jan 22, 2009

Puran Poli

There are very few people who can resist piping hot Puranpoli with ghee. That incredible aroma is one of festivities, of happiness and memories. It is the smell of sheer bliss of being with your family, people you love. And when you are trying to create a home away from home, that smell can work wonders.

So it was about time I made the Puranpoli myself. The idea was scary at first considering that it had to match up to my mom's Puranpoli for me to be satisfied. And in spite of using the same recipe it isn't really the same. I guess it can never be!


Anyhow. The recipe is considerably time consuming and tiring, but totally worth it.

Ingredients

For the Puran
  • 2 cups chana/harbara dal
  • 4 1/2 cups water
  • 2 cups jaggery
  • 1/6 to 1/5 cup sugar
  • A pinch of turmeric
  • 1 tabelspoon oil
  • Nutmeg for seasoning
For the covering
  • 1 1/2 cups wheat flour
  • 1/6 cup all purpose flour/maida
  • A pinch of salt
  • Oil
Method

Pressure cook 2 cups chana dal with 4 1/2 cups of water. Add a pinch of turmeric and oil while cooking it. Take 3-4 whistles or as many as are needed to cook the dal well. Strain the dal so that no water remains. Retain the water as it can be used to make katachi amti. Mash the dal to as fine a paste as possible. I do this as I do not have a puranyantra here, and the mixer does not do the job. The puranyantra is used after you have added the jaggery, but since it is difficult to get all the equipment outside of India I mash the dal and then knead it at the end too.

Now heat some ghee in a skillet and add the mashed dal to it. Also add the jaggery and sugar and stir continuously. Make sure that the mixture does not stick to the bottom as the burnt smell will spoil the desired aroma. Keep stirring till the Puran is dry and thick. Also add some nutmeg to it. Let the puran cool. Knead it upon cooling so that it does not have any hard parts in it. The puran has to be consistently soft, as any hard part can tear the covering.

For the covering mix the wheat and all purpose flour with water and oil. Knead the so that it is soft and almost sticky. Use oil generously when kneading the dough and let it rest for at least an hour. The more the dough rests the better.

When making the actual poli take a small portion of the dough and knead it again. Roll it out in a small circle. Take a bigger portion of the puran and close it inside the dough as if wrapping a ball. Close the dough so that the puran does not comes out from anywhere. Now roll out the ball gently into thin roti using rice flour. It is important to roll gently as the puran can come out due to excess pressure. It is common that the poli tears when we are new at it.

Heat a griddle and roast the puranpoli on medium flame until it is golden brown on both sides. Serve with ghee and experience bliss!

Jan 16, 2009

Sheera

If there was dish that my whole family loved, sheera would win hands down. It is a delicious quick fix to warm your winter evenings, sunday mornings or anytime you like.


Ingredients
  • 2 cups rava/soji
  • 1 3/4 cup sugar
  • 2 cups water
  • 2 cups milk
  • 2 tablespoon ghee or oil
  • A pinch of salt
  • Some cardamon
  • Raisins and/or cashews to garnish (optional)
Method

Heat ghee or oil in a skillet. Add some cardamom seeds and cashews to it and let it fry till light brown. Then add the rava and fry on low flame till it is light pinkish brown. Add a pinch of salt to it too. At the same time bring two cups of water and milk to boil together. You could add the raisins to the mixture, or add them to the sheera later.

Once the rava is light brown and the water-milk mixture is boiled, pour the mixture into the rava and stir continuously. Make sure that no lumps remain. Be careful while stirring the mixture as the boiling rava can jump out on your hand. Then add the sugar and continue to stir till the mixture starts drying up. Cover the skillet and let it steam on low flame for a minute. Serve the sheera with lemon pickel and a nice hot cup of tea.

Jan 13, 2009

Kasuri methi paratha

There is a couplet in Marathi with begins with "Bhajit bhaji methichi..." And methi or fenugreek is a difficult vegetable to deal with. It takes a lot of time to clean and shrinks dramatically when you cook it. But it also extremely healthy, filled with potassium, calcium, iron and said to protect against some cancers.

One of my favorite fenugreek recipes is the methi paratha. While fresh methi would be ideal, since I hate the cleaning part in it I prefer using Kasuri Methi. This is nothing but dried fenugreek leaves. They are easily available in any Indian grocery store and smell as good as the fresh ones.

Ingredients
  • 1/2 cup Kasuri methi
  • 2 cups wheat flour
  • 2 garlic cloves finely chopped
  • 1 teaspoon Ajwain
  • 1/2 teaspoon turmeric
  • Salt to taste
  • Red chili powder to taste (optional)
Method

Soak the methi for 30-40 minutes. Mix the flour, methi, garlic, ajwain, turmeric and salt into a dough. The dough should be soft but not sticky. Roll out the dough evenly in small circles making sure that the edges are not too thick. Fry the parathas on a pre-heated griddle/tava. While you can brush some oil on the paratha, I prefer to use ghee or butter after taking it off the tava instead of using it while on the tava. This also helps them stay soft longer. Serve the parathas with yogurt or pickel.

Jan 7, 2009

In search of the perfect kadhai

Since our only kadhai retired, we have searched stores online and off for a replacement. But nothing seems to fit the bill (and the couple that did, didn't fit the pocket). I doubt we would have to think about buying a kadhai for more than a minute in India.

Anyhow. The problem is that I need something for deep frying, the Indian way. The other skillets in my kitchen are good for everything else, including shallow pan frying. The bottom is an issue. I would like a round bottom kadhai, something that makes the deep frying more convenient. And non non-stick. But then I am skeptical of those steel skillets in the market, or the woks used for Asian cooking. The woks don't seem thick enough for frying level temperatures, and at the same time rather bulky in terms of balance.

So if you can tell me where I can get the kadhai for purposes of Indian cooking, particularly deep frying that would be a lot of help. It could be a store in the U.S. or somewhere online. Looking forward to some insights.

Jan 4, 2009

Kakatcurry

Until I left Pune more than two years ago, I hardly ever cooked anything by myself. With my mom and elder sister around I did not have to bother with cooking anything substantial. All I did was 'help' my mom cook, either cutting veggies, making raitas or some such stuff.

With my sister's wedding I finally ended up cooking any significant amount of food. And to my surprise I was a decent enough cook. Over the last two years I have developed my skills experimenting successfully with different types of food. With my husband as a foodie and an excellent cook, we have tasted some of the finest foods between home and restaurants (and put on a few calories too!)

This blog is a chronicle of my experiments, a diary of my recipes. I guess I could hand it over to my grandchildren someday ;)


Beet and Carrot Wadi

As you will realize a few posts down that I have a huge sweet-tooth. And so it was an obvious choice for me to inaugurate this blog with a 'wadi' that is simple, delicious and nutritious - the Beet and Carrot Wadi!

Ingredients
3 1/2 cups grated carrot
3 1/2 cups grated beetroot
1 mashed potato
1/2 cup grated coconut
1/4 cup condensed milk
1/2 cup whole milk
1 1/4 cups sugar
2 teaspoons ghee
A few green cardamoms seeds

Method

Take two teaspoons of ghee in a skillet. Put in the cardamom seeds once the ghee is hot. Then add the grated coconut and stir it till it is a very light brown. Add the grated carrots and beet to the skillet and stir till they appear to be shrinking. Pour in the condensed milk, whole milk, and sugar and mix it well. Due to the inherent sweetness of the beet and carrots this recipe requires very little sugar as compared to many other sweets. You can further reduce the quantity of sugar from the suggested 1 1/4 cup to one cup according to taste.

When stirring make sure that the mixture does not stick to the pan. The burnt smell can spoil the smell and flavor of the wadi. After about 8-10 minutes add the mashed potato and mix it well. The potato is necessary to hold the mixture together. The mixture will now appear to be almost liquid and requires to be cooked until it is just about dry. The consistency of the mixture should be only a little dryer than the regular 'halwa'. During the entire process do not use a lid as it will slow down the evaporation process.

Now take a baking tray and grease it with ghee or oil. Then transfer the mixture to it and flatten it out evenly. Set it to cool. Once the wadi is completely cooled off and appears dry, cut it into squares and serve.


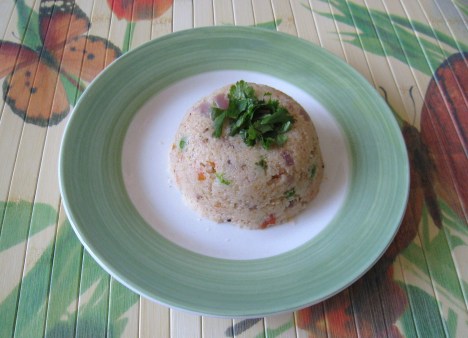
Upama

It is difficult to resist the quick fix snacks and meals especially when your living by yourself. But if you are health conscious you might not want to resort to the two-minute noodles or the frozen meals for long. So to our rescue is the Indian cuisine that offers a range of quick hot meal options.

We shall go into all of those as we go along the way. Today I shall being with one of my favorites, Upama. This dish is made of 'rava' or 'soji' which itself offers you three to four different dishes that take no more than a maximum of 30 minutes. While Upama can be made in various ways I shall give you the typical Marathi version.

Ingredients

  • 1 cup rava/soji
  • 1 cup water
  • 1 cup milk
  • 1/2 medium sized onion
  • 1 small tomato
  • 3 tablespoons ghee/oil
  • 2-3 chopped green chilies
  • 1/5 cup green peas
  • Approx. 1 inch finely cut ginger
  • 1 table spoon udad dal
  • 4-5 curry leaves
  • Coriander to garnish
  • Lemon to taste

Method

Heat one tablespoon of ghee/oil in a skillet. Add rava to it and fry on low flame until it is a very light brown. This stage is very important as a rightly fried rava sets the stage for a delicious and 'khamanga' Upama. Apparently it also reduces the chances of acidity after eating if you are prone to acidity caused by rava.

Once it is light brown set aside the rava and heat 2 tablespoons of ghee/oil in a skillet. Add chillies, ginger, curry leaves, udad dal and jeera to it. The add the chopped onion and fry till it is a light pink and seems transparent. Now add the chopped tomato and let it cook for a minute. Do not overcook the tomatoes as it would tun into a paste and give the dish a red color. We want to see tomato pieces at the end.

Now it is time to add the water and milk to the skillet. Some use only water, but I like to use some milk to give it that rich texture. Add salt to taste. It is better to add salt at this stage so that it mixes well. Once the mixture is about to boil add the peas. As peas are very easy to cook adding them at such a late stage helps them stay green. When the mixture starts boiling add the rava and stir such that no lumps remain. You should be very careful here as some boiling rava might jump out at your hand as you stir. You could use a lid for shielding yourself. So stir the rava well removing lumps till all the water is dried up.

Add the coriander and let it stay on low flame with the lid on. Turn off the gas after about a minute, squeeze some lemon for additional taste and enjoy!